Stress Testing Web Applications
As software developers, we are well aware of the pivotal role testing plays in ensuring the success of our web applications. Testing not only guarantees optimum performance under diverse circumstances but also facilitates the delivery of a top-notch user experience.
There are several types of testing techniques that can be utilized, such as unit testing, integration testing, functional testing, etc. However, there is a certain type of testing that enables us to evaluate how well our applications cope with extreme conditions. This technique is commonly referred to as stress testing.
In this blog post, we will delve into the concept of stress testing and demonstrate how to stress test a practical website using a popular stress testing tool.
What is Stress Testing?
Stress testing involves subjecting your application to extreme or unfavorable conditions that typically exceed its normal operating limits. This enables us to pinpoint performance bottlenecks, security vulnerabilities, and other issues that may remain concealed under normal circumstances.
Benefits of Stress Testing
By identifying and addressing performance issues ahead of time, stress testing helps to optimize the functionality of your application even under the most challenging scenarios. Moreover, stress testing can protect your application from potential crashes and security vulnerabilities while offering valuable insights into its ability to manage high traffic loads, unexpected surges, and other irregularities.
What’s the right way to do stress testing?
Although the browser developer console provides a straightforward way to stress test your web app by delaying HTTP requests, testing API responses under low internet bandwidths (e.g., 2G, 3G), inspecting HTML elements to identify UI breakdowns, etc., it has limitations and can be challenging to use.
To maximize the effectiveness of stress testing, it’s advisable to employ popular stress testing tools such as Charles Proxy, Fiddler, Wireshark, and Requestly. In this article, we will use Requestly to demonstrate how to stress test your web app.
What is Requestly?
Requestly is a free and open-source tool designed to modify HTTP requests and intercept network traffic. It allows you to specify rules that dictate which HTTP requests to intercept and how to modify them. To get an overview of what Requestly does, you can check out this blog we posted earlier. In this article, we will utilize Requestly to stress test Agoda.com, a popular website.
Requestly can be installed as a browser extension in modern web browsers like Chrome, Firefox, and others. Furthermore, it features a desktop app that you can use to stress test your application.
How to Setup and Use Requestly for Stress Testing
First, we’ll set up Requestly’s Desktop app on our local machine. Download and install the desktop app from here.
Then, open the Requestly app and click on the Connect apps button. Requestly will now show you different applications it can connect to and start receiving traffic from. Since we’re testing a website, we’ll choose a fresh instance of Google Chrome under the Installed browsers tab. Requestly will automatically detect all the installed browsers on your system. You can also connect it with external applications like Android or iOS devices under the Mobile apps and browser sections or observe traffic from terminal processes
For this tutorial, we’ll launch a new Chrome profile. Once you do that, Requestly should open a fresh Chrome instance. Now let’s visit Agoda.com on this browser. If you go back to Requestly now you’ll notice that it is listening to traffic on the newly launched Chrome profile. You can filter all the incoming traffic by Agoda.com under the Domains section in the left panel.

Great, we’re all set up! Let’s start stress-testing Agoda.com with Requestly now.
Simulating Bad API Responses
Websites should by default handle exceptions related to bad API responses. What if a developer unknowingly returns a response that the front end does not expect? Or what if there is a vulnerability through which an attacker corrupts the API response?
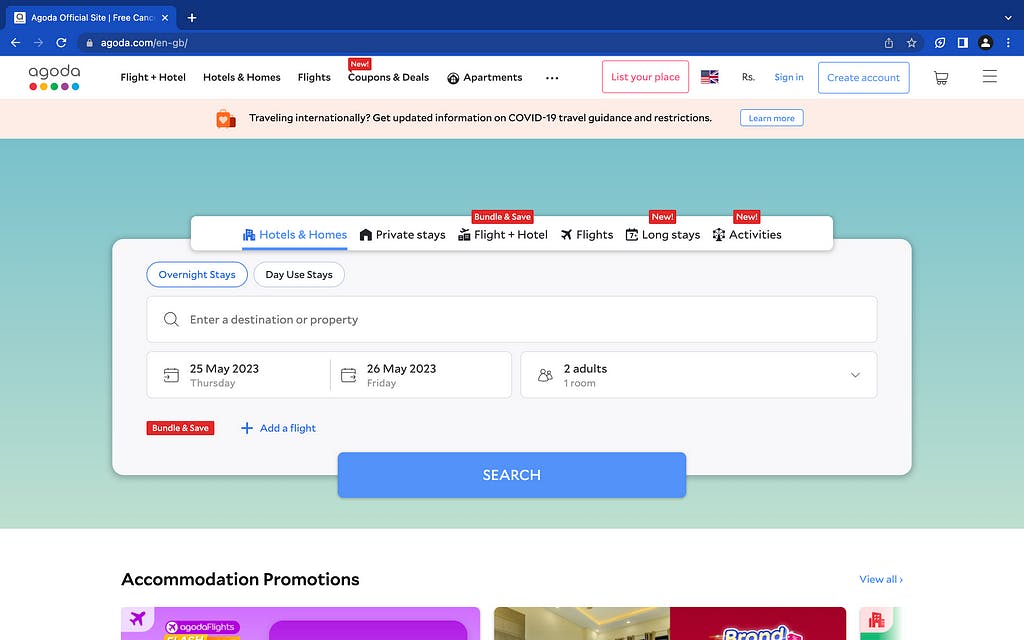
In all such cases, the front end should be able to handle these responses accordingly. The top banner on Agoda.com and the text on that banner come from an API shown below:
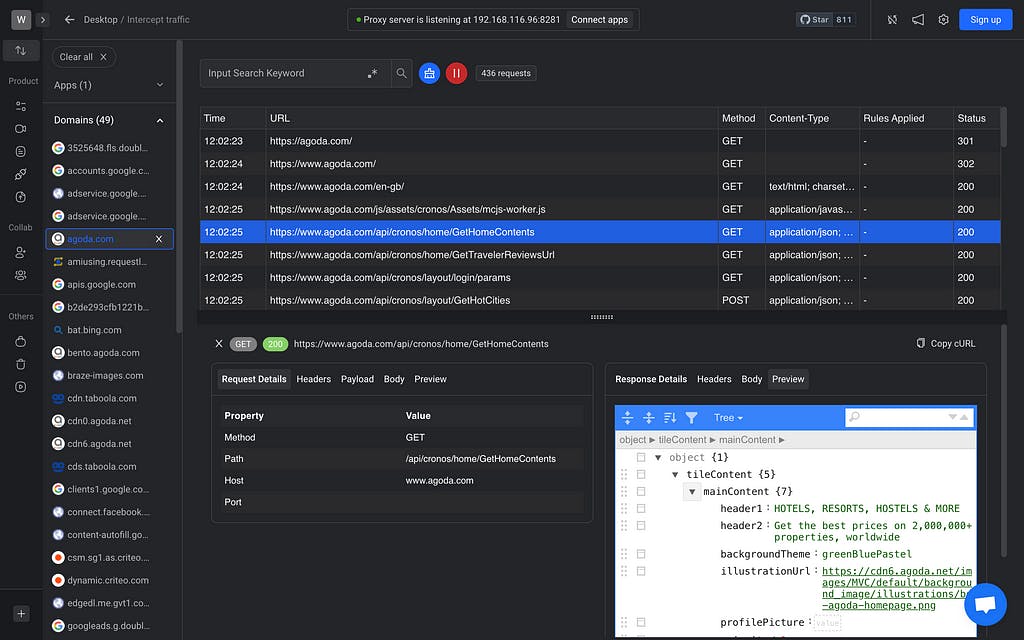
As you can see, inside the tileContent object there’s another object called mainContent. Further, the header1 property here is being used to display the image and content on Agoda.com ‘s header.
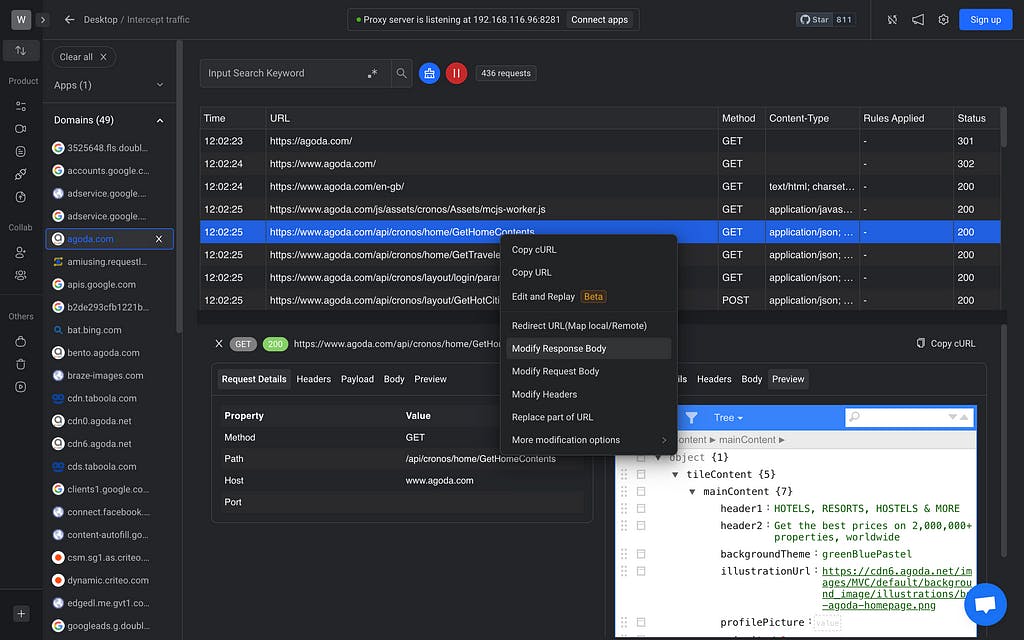
Let’s now modify the response to this API. We can do this by creating a new rule. To create a rule, right-click on the API, and choose Modify Response Body option:
Then, under the Response Body section, let’s select Static Data and add an empty object ( {} ) underneath it:
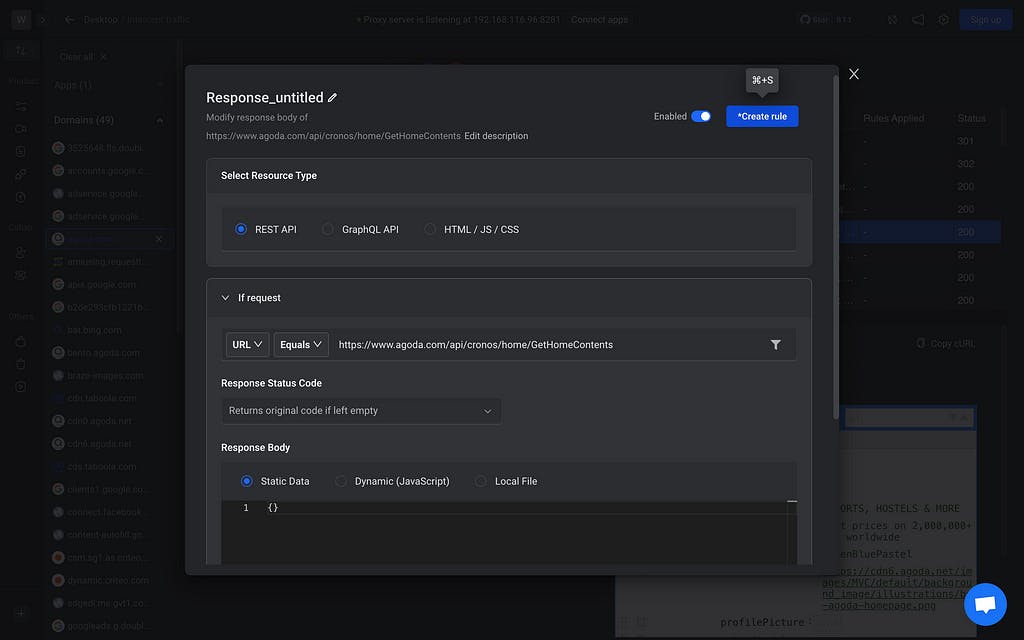
The above rule will return an empty response from the API. Click on Create rule and now let’s see what Agoda.com looks like. You might want to reload the website so that the new response can come in:
Both the image and the original text from the header have disappeared. This is because these details are no longer present in the API.
However, this doesn’t change any behaviour on the website. You can still search for hotels, flights and more from the booking section above the header. This means that Agoda.com has handled bad responses from this API such that they don’t affect any functionality of the website. You can learn how to simulate
But have they handled issues such as overflowing text on their header? Let’s go back and now return the original response from the API. However, this time we’ll add a long dummy text to the header1 property instead:
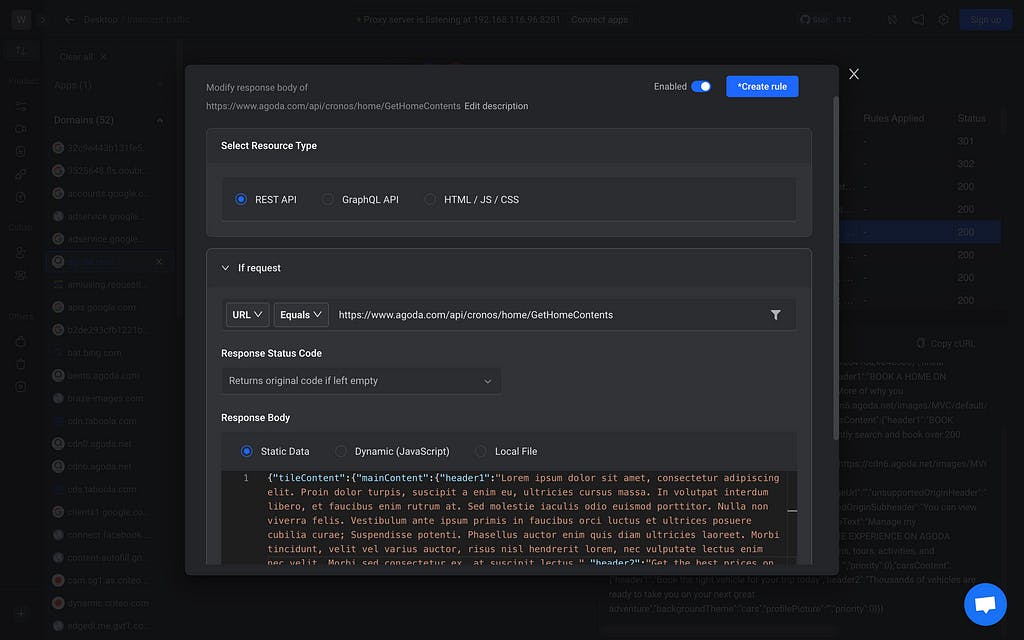
I’ve added some dummy Lorem Ipsum content that will most likely overflow from the desired space given to the header container. Let’s save this rule and see if Agoda has handled this by trimming text beyond a certain character limit:
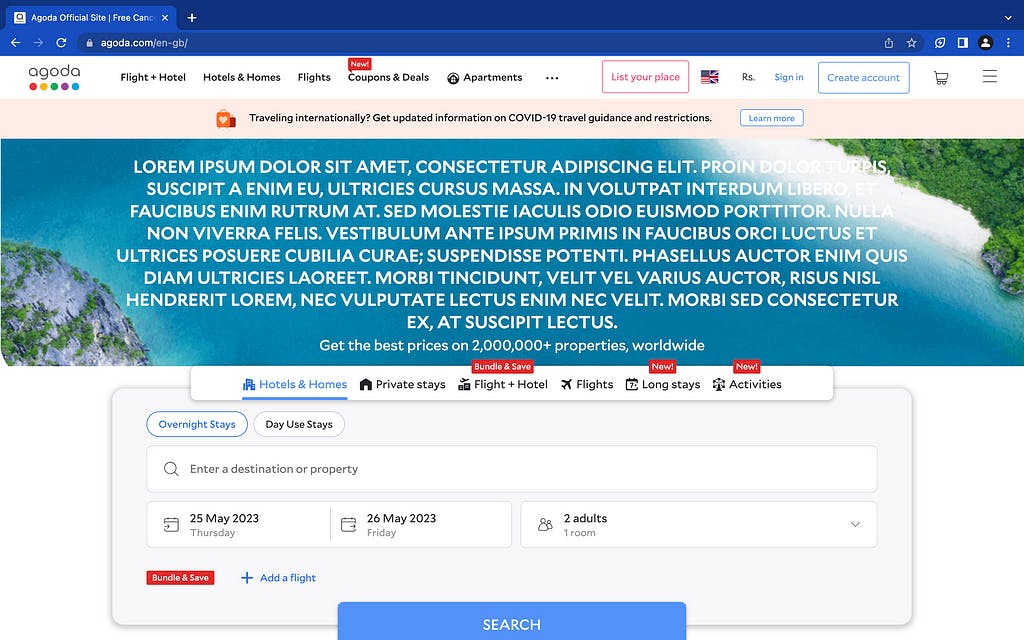
It seems like they haven’t! As you can see, the booking section shifts underneath the header. Ideally, all Lorem Ipsum beyond a certain character limit should have been trimmed out.
Even though this doesn’t directly affect any functionalities on the page, an even longer text could make the booking section below the current viewport. This would cause the user to scroll the page in order to reach the bookings section leading to a bad user experience.
Modifying API Latency
API latency refers to the time it takes for an API to respond to a request. Stress testing latency helps identify performance issues and bottlenecks that could affect the application’s overall performance and user experience.
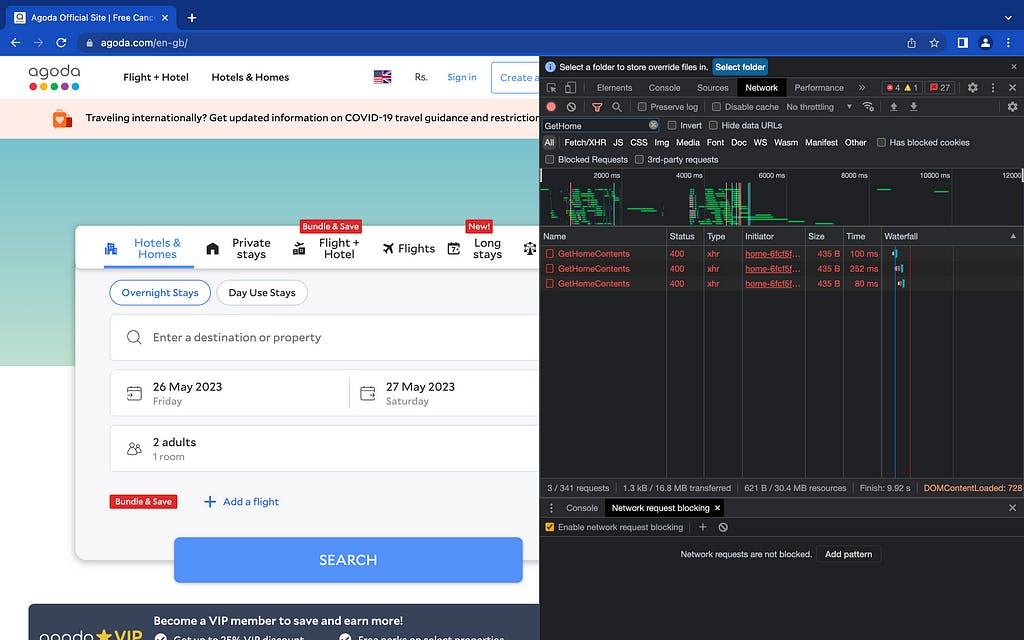
Similar to setting bad responses, you can use Requestly to create a rule that delays the response of an API. Right-click on the API, choose the option More modification options, then select the Delay Request option. Once you do that, you can set the DELAY parameter for the request in milliseconds. Let’s delay this request by 5 seconds or 5000 milliseconds.
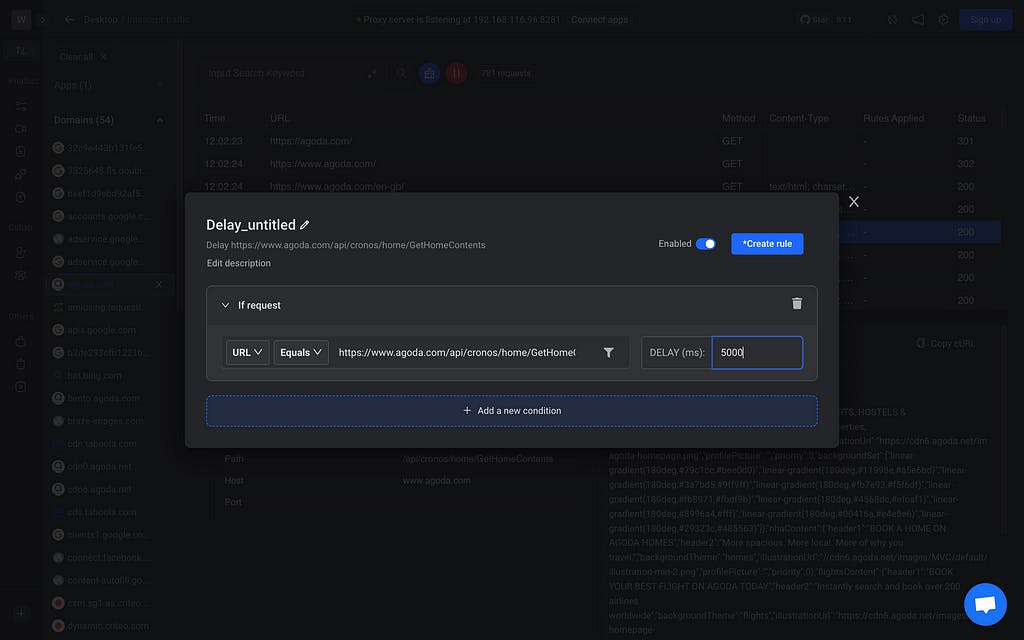
Now let’s go back to Agoda and hit the API again. You can see that the API is pending for 5 seconds:
Once the response comes back, you can see under the Time section that this API took 5 seconds to respond:
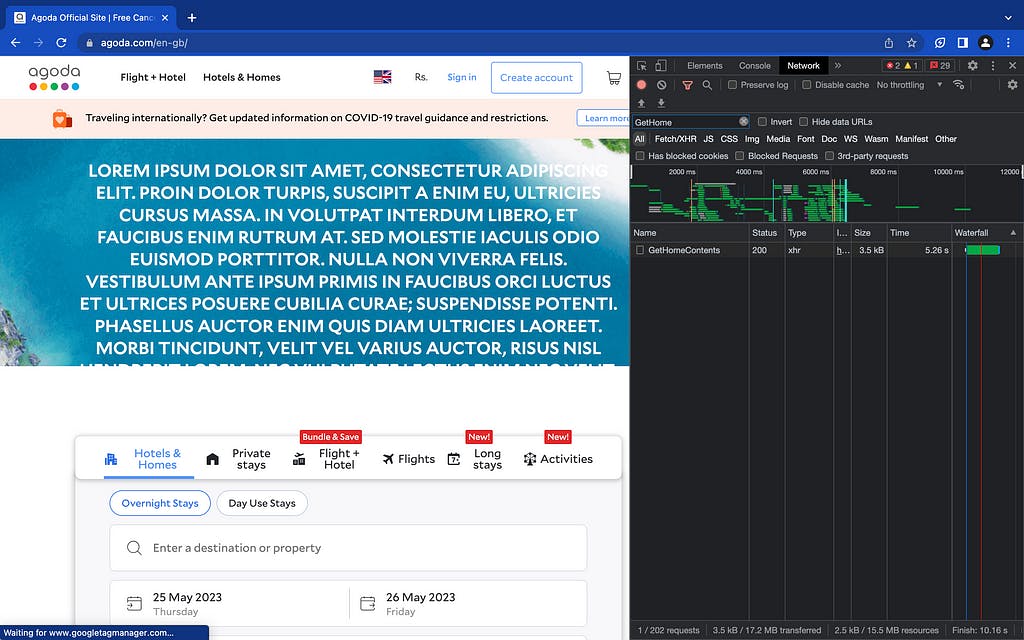
By measuring API latency under various scenarios, we can optimize the website’s performance, ensuring it can handle high traffic and other unfavorable conditions.
Testing Big Response Size
Often times websites succumb to large response objects in requests leading to slow response time or even crashes. We can find this out by testing the website with a big response size in the APIs.
I’m going to create another rule similar to the way we did when adding bad responses. However, this time I’ll programmatically generate a large response object.
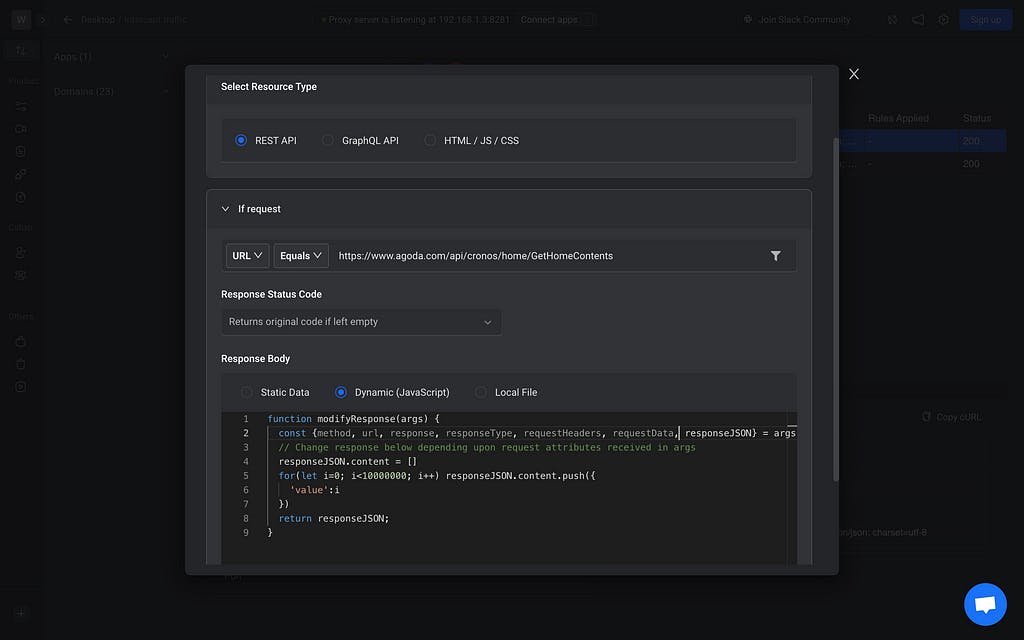
Under the Response Body section, choose the Dynamic option. Here, you can write some custom JavaScript to generate a big response object.
The responseJSON is the response object in JSON format. Here I run a big loop and simply push some data inside the content property on the responseJSON object. Let’s save this rule and go back to check what happens on Agoda:
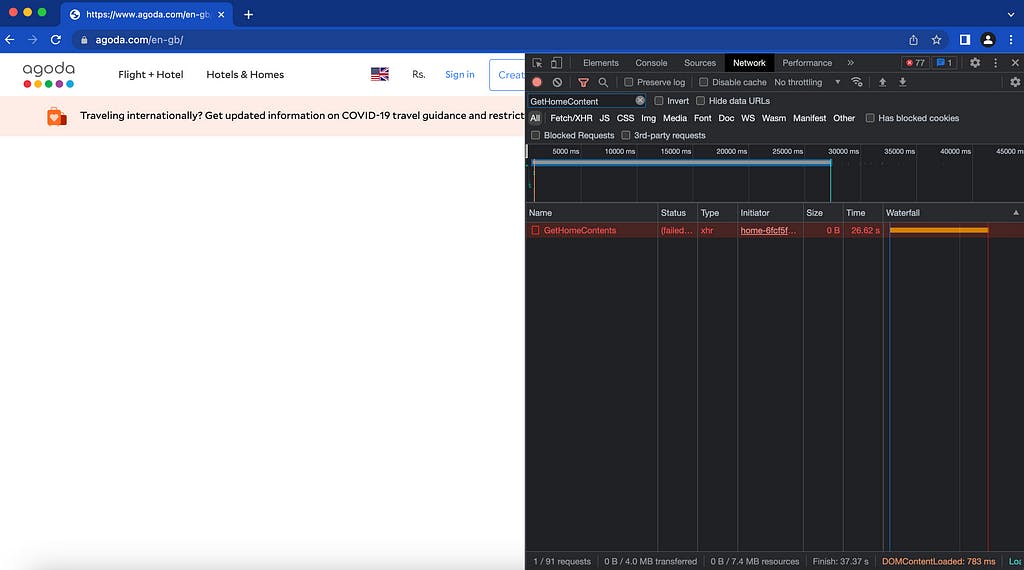
The API actually failed! You can also see the application crashing since now everything on the homepage disappears. The booking section also disappears. This is one exception Agoda.com hasn’t handled and a response as big as this would make the website crash.
Simulating API Failures
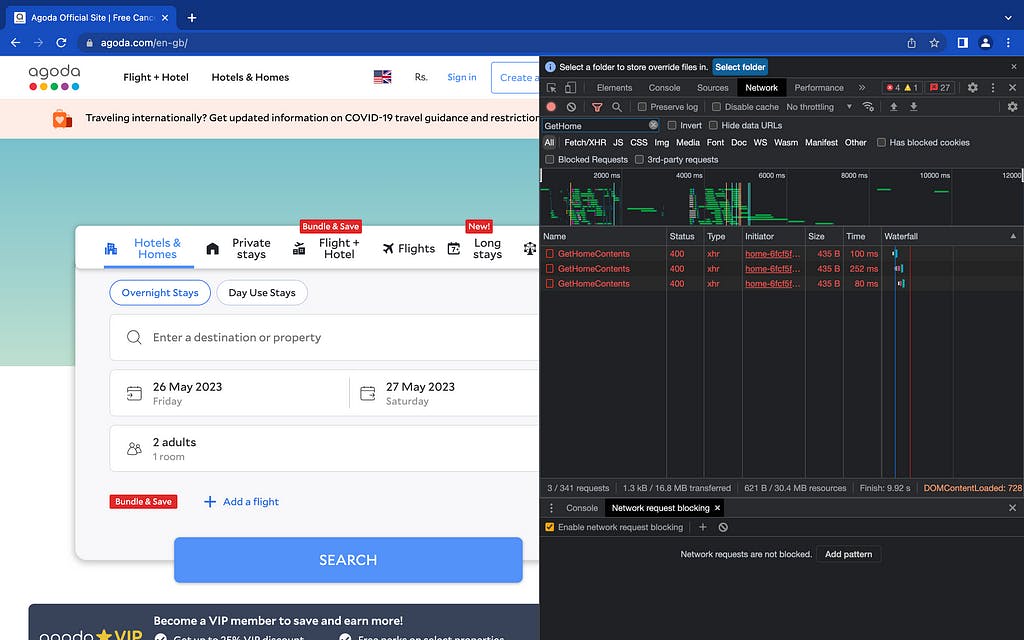
We can also simulate API failures by explicitly setting a specific status code. Let’s create a rule to modify the response body but this time we’ll set Response Status Code to 400. Once you create this rule and go back to the website, you should see the API returning 400 as shown below:
Blocking Scripts
You can also block or cancel requests and scripts such as CSS/JavaScript files or even images. Let’s block an HTTP request that fetches the Agoda logo:
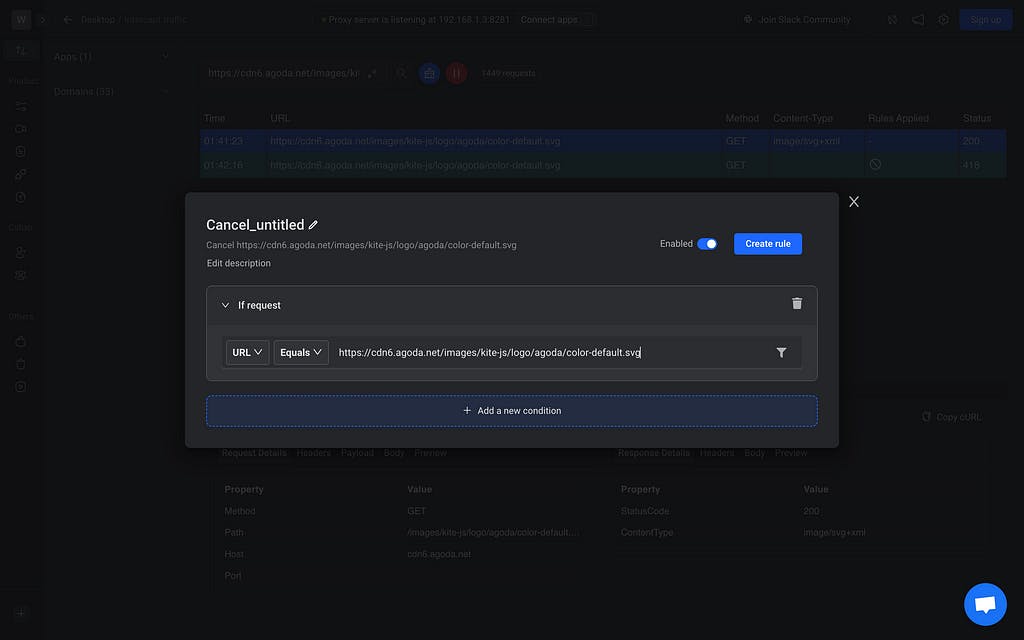
And now, when you send the request, the image or Agoda’s logo no longer appears on the navigation menu.
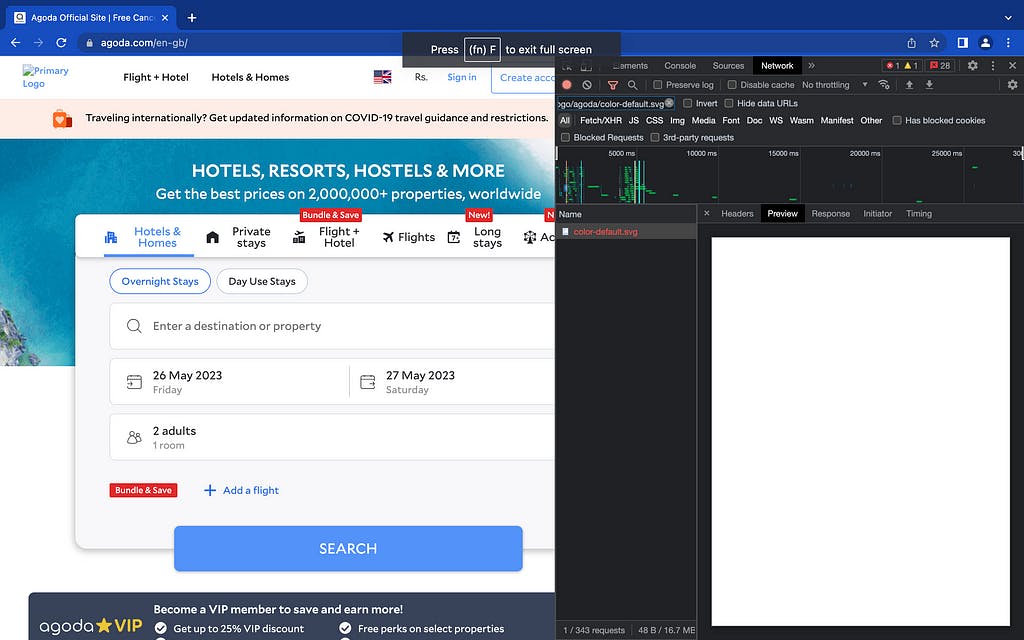
This tells us that In the event of a request failure to get an asset, there is no placeholder image that is used as a fallback, but an alt text is shown.
Conclusion
It is crucial to conduct stress testing in order to determine the operational thresholds of your application. Despite being widely used, even popular websites can overlook certain exceptions, leading to suboptimal user experiences, crashes, or other usability challenges. You can leverage tools like Requestly to conduct stress testing and debugging for web as well as native applications on both Android and iOS platforms.
Requestly is an Open-Source frontend development platform with essential tooling & integrations that helps frontend developers write, test & debug their code 10x faster. Using Requestly, you can create mock API endpoints, test, validate & override API responses, modify request & response headers, set up redirects (Map local, Map remote) and use Requestly sessions for faster debugging.
Originally published at https://requestly.com.
